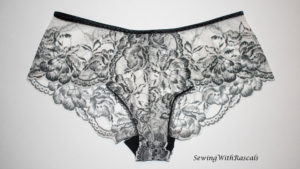
 Who doesn’t love a FREE pattern!? I know I have collected many over the years. I learned about this one from Libelle Sewing. She posted it on her facebook page. The pattern is in German but, have no fear, that is where I will help!
You can download the free pattern here: http://www.sewy.de/Downloads-oxid/
You will want to open the first file called “Masstabelle Slip Violet”. Masstabelle means Measurements, so this file is where you will find your size. The first arrow points to the waist and says “Taillenumfang: Das Maßband waagerecht um die schlankste” which basically means to measure at the slimmest part. What you want to do is revert to your childhood and act out “I’m a Little Tea Pot” … no joke (well not fully haha). When you bend to “tip me over and pour me out” the area that creases is where you want to measure. Remember, Germany is Metric, so measurements will be calculated in centimetres. Hopefully your tape has both cm and inches, but Google can help if it doesn’t. Find your waist measurement in the chart (on the lower left of the page) under the column marked “Taillenumfang” and record the coordinating size under the column marked “Größe”. Next is your hip measurement “Hüftumfang: Das Maßband waagerecht um die stärkste” basically means to measure around the widest part of your buttocks. Find your hip measurement in the chart under the column marked “Hüftumfang” and record the coordinating size under the column marked “Größe”. Choose your best size by going between your sizes, sizing up, or down, whatever you feel is best. You can even print both sizes and grade from one to the other by overlapping the patterns and drawing lines to connect the two sizes together. If you fit into one size… lucky you!!
My measurements gave me a 40 for my waist and a 34 for my hips. This is very typical for me, since I am not curvy. I opted to go with a size 36 based on what I have done previously with other, similar patterns. Go back to the main webpage with all the downloads. Each download has the size at the end. My size I choose was 36, so I downloaded this file “Download Slip Violet Schnitt und Anleitung Groesse 36”. It just means, basically, that it’s the pattern pieces to cut, and the instructions to make, the Violet panties.
Now, two things to keep in mind:
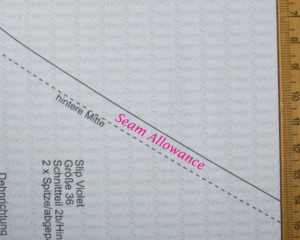
- Typically German patterns do not include seam allowances, however, this one has a 7mm seam allowance YAY! (shown by the dotted line on the pattern pieces; see my note in pink within the seam allowance). You can choose to make that larger if you wish by just adding to the edges. 7mm is about 9/32 of an inch so close to 1/4 inch, which is what I used.
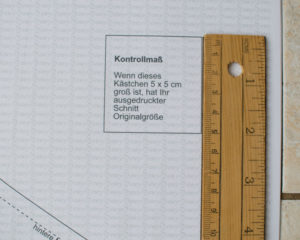
- Remember when you print a German pattern, if you use US Letter paper, it may or may not print correctly (it depends on the margins used in the pattern). US Letter paper is 8.5 inches x 11 inches, A4 paper (which is what is used in Germany) is 8.3 inches x 11.7 inches. If you have some, you can print on Legal paper, it again is bigger than A4 size but you won’t end up with pieces cut off during printing. Just make sure you set your printer settings to Legal as well as using the legal size paper 😉 Once printed check the test square to ensure it measures 5cm x 5cm.
Page 1 of the instructions shows the 3 pieces you should end up with for this pattern. You will need to tape at least one of them together. I had to tape together my piece #2. It says “bitte hier schnitteil 2a und 2b zusammenkleben” which means to stick pieces 2a and 2b together here. So you just butt those two ends together and tape to make your full piece 2.
“Zuschnitt” is your examples for laying your pattern pieces to cut out on different sizes of Galloon lace. If you have questions on this section you can leave a comment below or send me a message here. It’s pretty straightforward if you just look at the diagrams to figure out which lace you have etc. I am going to use a lace that is 8.75 inches wide so all my pattern pieces fit within the width of the lace. Libelle Sewing has all their stretch laces divided by size, making them easy to sort through. REMEMBER, if you have to cut your lace to fit together, add seam allowance and make sure it’s the same seam allowance on all pieces. Cut your liner from a, preferably, natural fabric with stretch, like cotton spandex or bamboo spandex.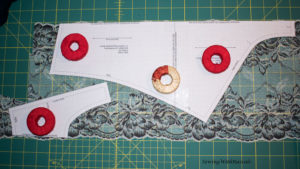
Step By Step:
- You should have all your pieces cut from your lace, or whatever stretch fabric you choose to use. You can use a sewing machine only or an overlocker and a sewing machine. An overlocker only will not work for this pattern. I will be using just my sewing machine.
- Starting at step 2 on page 4: Sew your two front pieces together as shown in the diagram. You can use a longer straight stitch or a narrow zigzag. Then open up the seam, or push it to one side with your fingers and top stitch the seam flat using a wide zigzag. I personally prefer a 3 step zigzag stitch.

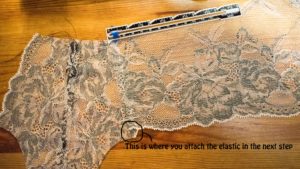
- Next your going to put the front piece you just put together, on the two back pieces. Make sure the front piece is on the outside/front/right side and do each side one at a time. I used my seam gauge to make sure I kept the correct seam allowance. Top stitch it on using a zigzag stitch. Note the extra bit that is overhanging at the bottom of the front piece, your going to attach elastic here and fold it over so make sure you leave the extra at the bottom like it is in the photo below.
- We are now on step 5 in the instructions. It says to measure the curve of the front piece (see the diagram), subtract 5% from that measurement, then add an additional 1cm. I only subtracted the 5% and next time I wouldn’t even bother doing that. All you need to do is reinforce that area with elastic, so it can be the same measurement as far as I am concerned. Attach the elastic to the right side of the lace with the right side of the elastic facing up. So right side to wrong side, see photo below. Use a medium width zigzag stitch, and stitch close to the picot edge of the elastic. Then flip the elastic to the inside, so the picot edge is just showing from the outer front. Stitch again using a medium width zigzag, close to the inner edge of the elastic. Repeat for the other side.
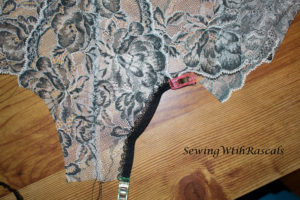
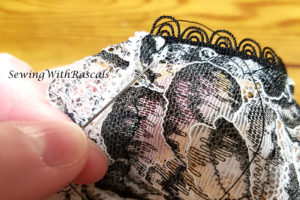
- Tip: leave your thread tails decently long at both ends. Use a sewing needle to pull the thread tails all to the back/wrong side/inside of your panties. Then simply tie the tails, at each end, together. I like to tie 3 knots to make good and sure they won’t come undone during regular wash and wear.
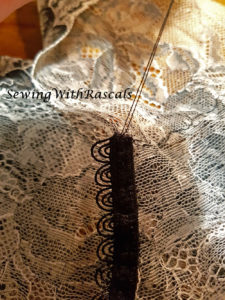
- Now your going to attach your back pieces together. This is step 7 in the instructions. Use the same stitch you used to attach your two front pieces together and then top stitch the seam the same as you did before as well.
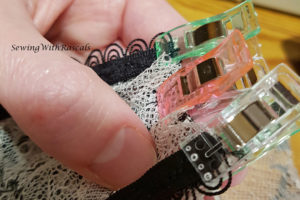
- Attaching the front and back at the crotch is next. Take a look at the diagrams on page 6 and 7. The front will need to be folded, basically making two pleats. The photo below shows how I lined up my centre points first, then either end. After matching those three points I made my folds. The instructions tell you to baste this together now. You can choose to do so or wait to sew it when you attach your liner, like I did.
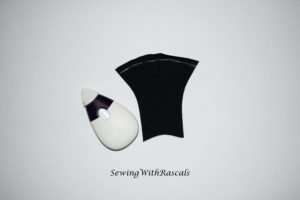
- You’ll be folding over and top stitching your liner end that remains unattached now. I used my favourite new tool 😀 my chalk wheel (you can get the same one on Amazon: PRYM 610950 Chalk wheel ‘Mouse’ ERGONOMIC, 1 piece
) and just estimated the allowance then used that line to fold over and stitch. I did a wide three step zigzag, you can use whatever stretch stitch you want to really. I did give the liner piece a good steam press with my hot iron after just to make sure it stayed in shape.
- Now you’re going to want to attach your liner piece by laying it wrong side up on the FRONT piece of the pantie. So the side you attached the elastics to. The diagram in the instructions also shows it well (step 12 on page 7). Use a straight stitch to sew all three pieces together. Secure your stitches and cut the tails.
- Fold the liner to the back so it encloses the raw edges. Sew along both sides using a zigzag stitch. I again, use a needle to thread the tails to the back and tie knots to secure my stitches.
- We are now on step 14. You can use picot elastic and use the same technique to sew it on as you did for the picot on the inner leg. Or you can use Fold Over Elastic or FOE, which is what I used. The instructions say to measure the opening and subtract 5%, then add 2cm. However, I always use my body to measure elastic for things like this. You can try your Violet’s on now and see where they will fall on you. Next simply take your chosen elastic and stretch it to what’s comfortable around your waist where the pantie waist will be and mark that on your elastic. I usually cut right on that line then overlap by 1/4 inch because it won’t make much of a difference and I find I usually err on the looser side than I do on the tighter. You will want to mark your quarter points on both your elastic and your pantie. Match up the back with the ends of your elastic first then match your other 3 points. Sew using a zigzag stitch, stretching as you go. Again when I finish I use a needle to pull all the tails to the inside and tie them together then cut them. And your DONE!

I found these to fit wonderfully. The only thing that I will change next time is the liner. It goes completely to my backside haha! I haven’t quite decided if I will draft my own liner or what I will do. I will update this post when I get around to making another pair. For a free pattern though, this is really great! I love the detail on the front, I think it would look neat with two different laces, one as the front pieces and another as the back pieces just to make that front part show better. I also really appreciated that these don’t ride up in the front like other pantie patterns do that I have made… and paid for…
Make sure you check out Libelle Sewing for all your stretch lace and elastic needs! She ships internationally and pricing is unbeatable!! Don’t forget to let me know, in the comments, how you find your Violet Panties when you make them x
*This post contains affiliate links. See my about me page for more information on these if you’re curious.
I. Love. This!
And I’m about to babble incoherently because I’m so excited…
I got the same link to the pattern from Libelle, but when I got there I was discouraged because I couldn’t even guess where to start. Your translations and guide to the pattern page were exactly what I needed to stop pouting. (Yeah, I know I could have bothered one of my friends who speak German but I didn’t want to be a pain.)
And on top of it all, you made your panties from the very first Libelle lace I fell in love with (and just unwrapped yesterday).
So guess who is going to follow your instructions faithfully to make a duplicate of masterpiece. … Me!
Ok, I’m going to take a chill pill now and stop squealing.
I am so glad you found it helpful! I just love this lace too, it’s so pretty.